
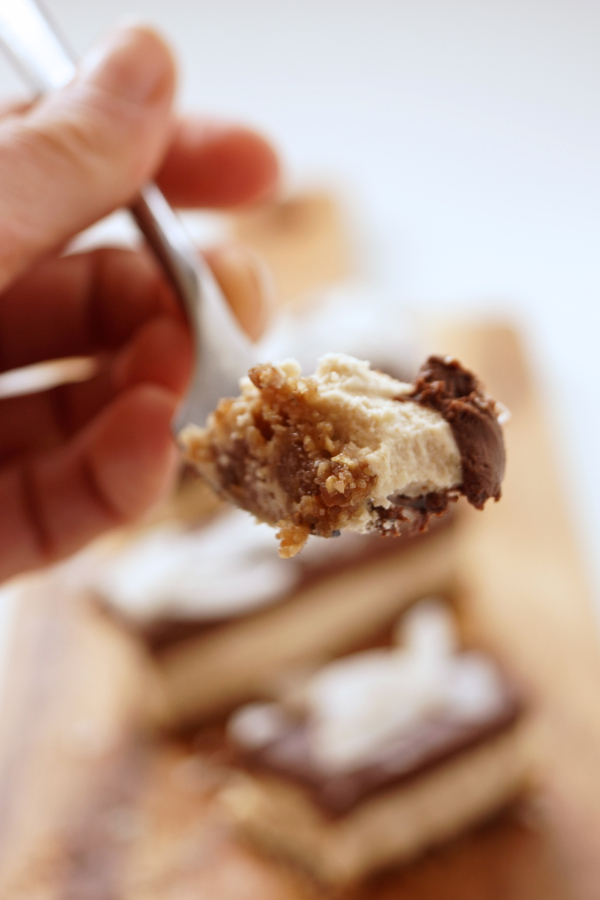
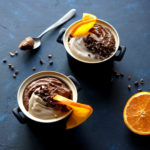
I’m often surprised how people react to vegan food. Especially to vegan treats or baked goods. It seems like we’ve spent so many decades basing our food creations on milk (produce) and eggs, that a lot of people are still hit by surprise when they eat a vegan treat without realizing it’s vegan. And even liking it „despite“ the fact that it’s vegan – if you know what I mean ;). This happened when I first served these 3-layer Chocolate-Coconut-Cheesecake Bars. They are so decadent, rich and creamy, nobody wanted to believe me that they’re vegan, raw, glutenfree and sweetened by nature only!

I was tempted to describe these bars as „sugarfree“. But let’s be honest – it’s a dessert or sweet treat or however you wanna call it. And to make it sweet there is something needed which actually „is“ sweet. However, I’ve never been a fan of artificial sweeteners and I’m avoiding refined sugar where ever possible. So, these bars are sweetened by nature only, which means they are refined sugar free and the sweeteners I used are coming from mother nature directly. These include dates, dried mulberries and coconut sirup. No guilt but pure satisfaction guaranteed 😉
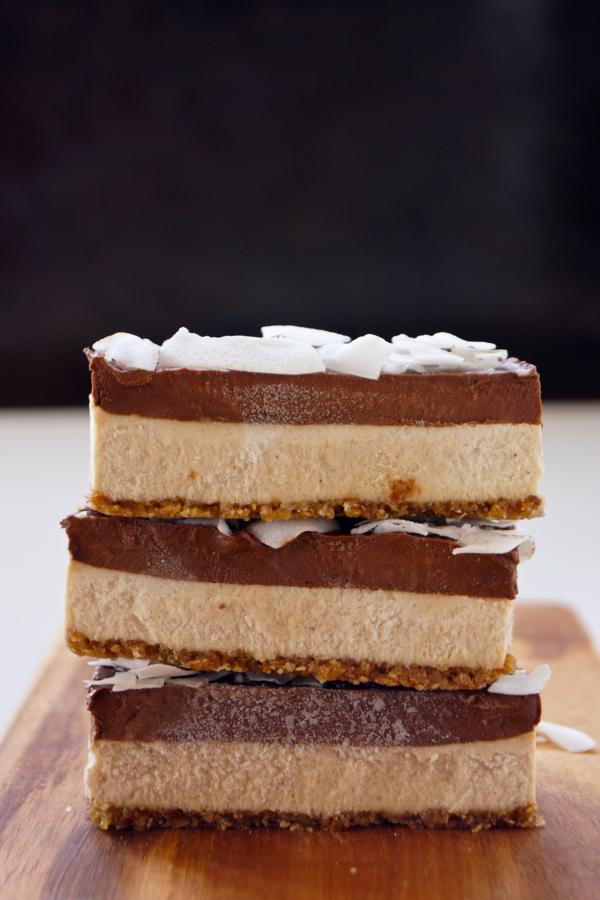
Also, this decadent treat is the perfect make-ahead dish. You can easily whip it up in less than 15 minutes (if you exclude the overnight soaking of the cashews). The only thing you need is your food processor, a rectangular baking tin (I used a baking frame for easiest removal) and a freezer. Once done and set, you can cut the slab into bars and store them in an airtight container in your freezer. They will stay delicious for at least 3 weeks (if you can keep your hands off of them for that long 😉 ). You can enjoy them straight from the freezer like icecream bars, defrost them for about 1 hour and you will have a semifrio – as the Portugese would say – or defrosted completely for 3-4 hours or overnight in the fridge and you have a creamy and decadent chocolate mousse topped cheesecake bar.
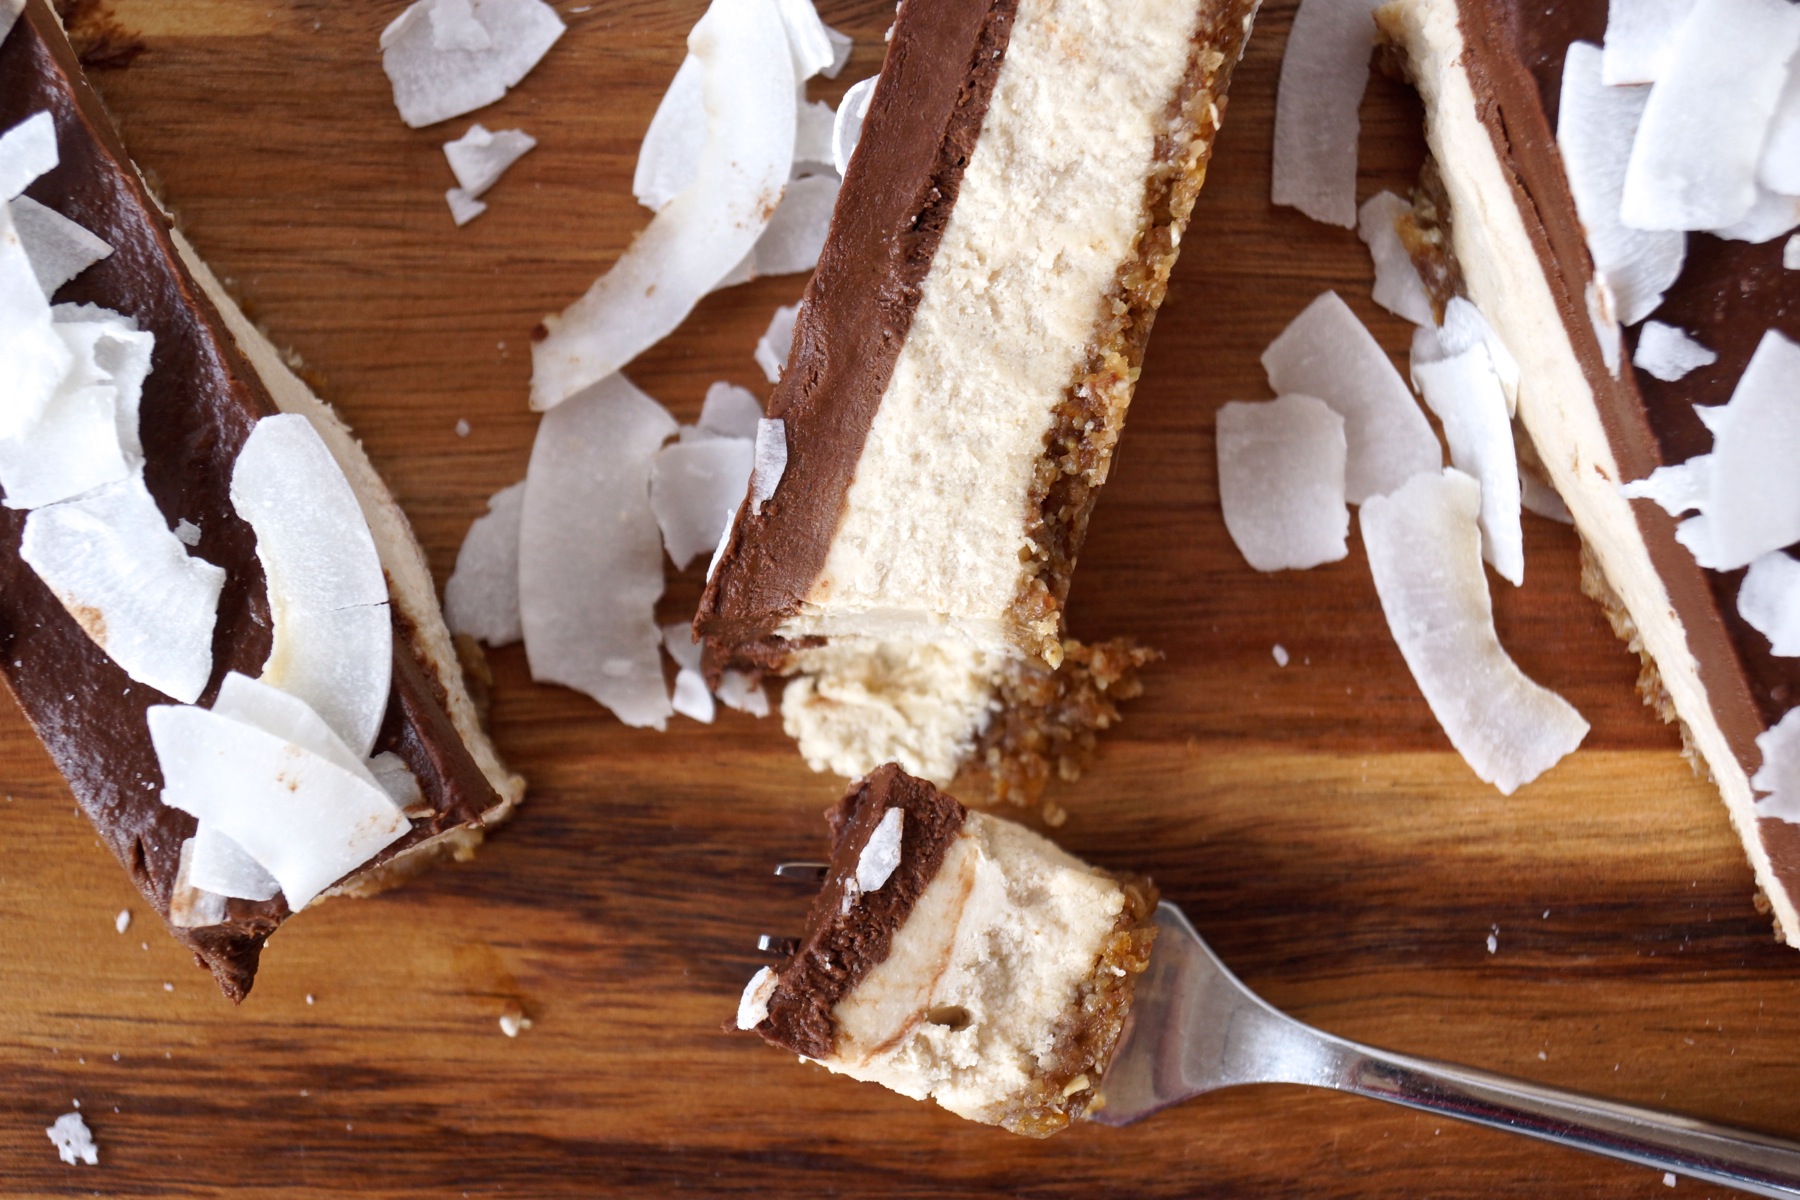
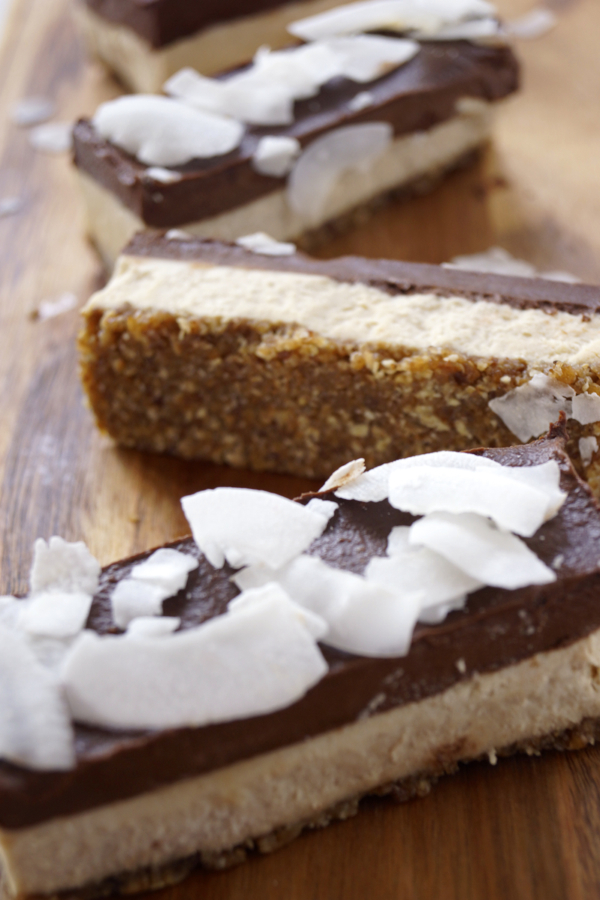
And, lastly, here’s how easy it is: the base for this no-bake goodness is made out of dates, oats, white mulberries and pecans. Simply add all ingredients to your food processor and pulse until combined. Next up is a layer of vegan coconut cheesecake based on soaked cashews. Top this goodness with a chocolate avocado mousse and you’re ready to go! It’s as simple as that!
- Base
- 65g (1/2 cup) pecans
- 125g (3/4 cup) dried dates, pitted
- 45g (1/2 cup) rolled oats
- 70g (1/2 cup) dried white mulberries
- pinch of salt
- Coconut Cheesecake
- 320g (2 1/2 cups) raw cashews, soaked in tap water over night
- 250ml (1 cup) coconut cream (the solid part of 1 can coconut milk after being chilled in the fridge overnight)
- 2 tbsp white miso paste
- 2 tbsp coconut sirup
- 1 tbsp vanilla extract
- Chocolate Mousse
- 85g (1/2 cup) dried dates, pitted
- 200g (1 1/2 cups) dark vegan chocolate (70% or higher)
- 2 medium avocados (about 2 cups avocado flesh)
- 1 tbsp vanilla extract
- 2 tbsp unsweetened cocoa powder
- Place cashews in a medium bowl and cover with tap water. Let soak overnight.
- Place a can coconut milk in the fridge. This will lead to the separation of the coconut cream and the coconut water.
- Line the base of a rectangular baking dish (20x25cm) or a cake tin (26cm diameter) with parchment paper. (I used a baking frame and placed it on a cutting board lined with parchment paper).
- Roughly chop pecans and dates and place them in a food processor together with the oats, mulberries and salt. Pulse a couple of times until finely chopped and the mixture easily holds together when squeezed in your hands.
- Press the mixture evenly into the prepared baking tin and place in the freezer while you prepare the coconut layer.
- Drain and quickly rinse the cashews. Place them in the cleaned bowl of you food processor.
- Open the can coconut milk and spoon out 1 cup of the coconut cream which should have solidified at the top of the can. Add to the cashews together with the miso paste, coconut sirup and vanilla extract. Puree until smooth and creamy.
- Remove the base layer from the freezer and pour coconut layer on top of it. Gently tap the tin on the counter to even the layer out. Place in the freezer while you prepare the top layer.
- Place dates in a small bowl and pour boiling hot water over them. Let sit for 3-4 minutes.
- Chop the chocolate and gently melt it in a bain marie (place a heat proof bowl over a pot of simmering water, without the bowl touching the water). Set aside to cool slightly.
- Scoop out the avocado flesh and remove the stone. Place in the bowl of your food processor.
- Drain the dates and add them to the avocado together with the vanilla, cocoa powder and the melted chocolate. Pulse until smooth and creamy.
- Remove baking tin from the freezer, pour chocolate mousse over the coconut layer and smooth out evenly. Cover and place in the freezer until firm. About 1 hour.
- Remove from the tin and cut into bars or slices using a sharp knife.


Schreibe einen Kommentar